Group Note Feature
The Group Note feature is a powerful new addition to our EHR system, designed specifically to streamline documentation for group sessions and enhance practice efficiency. This innovative tool allows healthcare providers to simultaneously manage and document multiple patient encounters during group appointments, saving valuable time while maintaining high documentation standards.
This guide provides step-by-step instructions for utilizing the Group Note feature effectively.
Creating a Group Note
Group notes in an EHR system are used to document shared information for appointments involving multiple patients.
![]()
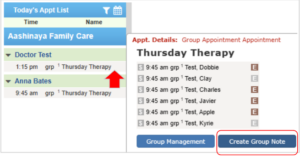
- Open the EHR application and navigate to the Today’s Appointment List.
- Locate the specific group appointment you wish to create a note for and select it.
- Click the Create Group Note button to open the group note interface.

Managing Attendance List
Managing attendance in group notes ensures accurate tracking of which patients were present or absent during a session.
![]()
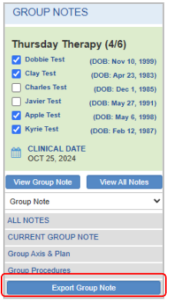
1. Navigate to the group note you just created.
2. To mark a patient as absent, uncheck the box next to their name in the attendance list.

3. The interface will automatically update, removing individual sections for patients marked as absent.

Documenting Shared Notes
Text entered in the Shared Note section will be copied into the Shared Note section of each individual patient’s note during the export process, ensuring consistent documentation across all relevant patient records. Notes in this section are not intended for individual patients.
![]()
- In the designated area for shared notes, type the information that applies to all attending patients.
- Click the Save button to save the shared notes.

Adding Patient-Specific Notes
Text entered in the Individual Notes section will be transferred to the corresponding Individual Note section of each patient’s record during the export process.
![]()
- Click on the text box for each patient to add notes specific to them.
- Ensure to enter and save notes for all patients attending the appointment.
- Click the Save button to ensure all individual notes are saved.

Adding Axis & Plan
All data entered in the Axis & Plan section will be automatically transferred to each patient’s individual note during the export process. This ensures that diagnoses and assessments are recorded consistently across the group and individual notes.
![]()
- Open the Group Axis & Plan section from the sidebar.
- Enter relevant details:
- Axis IV: Document any psychosocial or environmental issues affecting the patient’s care.
- Axis V: Provide information on the patient’s current functioning or treatment focus.
- Use the Discussion field to summarize treatment observations or next steps.
- Enter any necessary Free Text Assessments in the designated field and click Add Free Text Assessment.
- Use the Add Problem button to select relevant ICD codes or problems
- Click the Save button to save all entries.

Adding Procedure Codes
All CPT codes added in the Group Procedures section will automatically carry over to each patient’s individual note after the group note is exported. This ensures accurate billing documentation.
![]()
- Navigate to the Group Procedures section.
- Select the relevant CPT codes:
- Type the CPT code or a description of the code into the search bar located in the Procedures tab and
- Click the Add button to select the appropriate code from the search results, OR
- Select the code from your superbill to add it to the Current Procedure section.
- Add any necessary comments in the Comments field for further clarification (e.g., specific details about the session or patient’s response).
- Note: Codes applied to the group note will automatically be added to the Orders & Procedures page of each patient’s individual note.

Exporting to Individual Charts
The Export to Individual Charts function transfers all shared notes, individual notes, diagnoses, Axis & Plan data, and procedure codes to the respective patient charts. It is important to note that the export process can only be performed once. Therefore, all relevant information must be carefully entered and reviewed prior to signing and exporting the note to ensure accuracy and completeness. Once exported:
- Axis & Plan and Procedures entries will be reflected in the Axis & Plan and Orders & Procedures sections of each patient’s individual note.
- Shared Notes and Individual Notes will appear in the Group Note section of the individual patient notes.
![]()
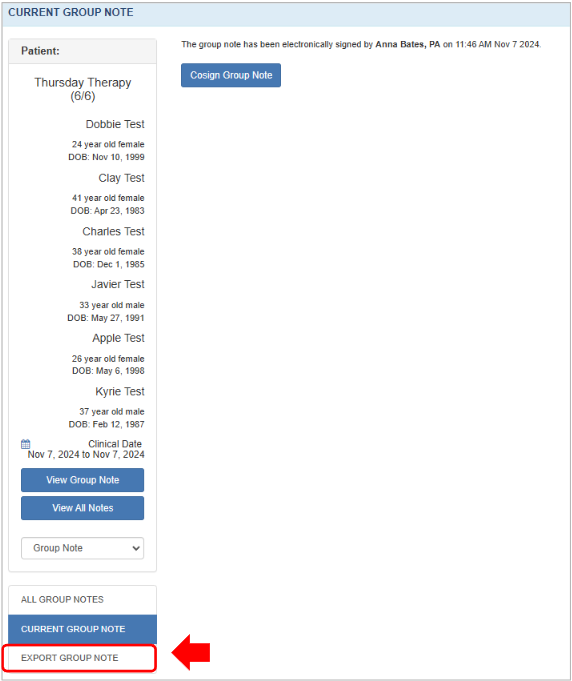
- Review and save the Shared Notes, Patient-Specific Notes, Axis & Plan, and Procedures sections to ensure all information is accurate and complete.
- Click the Export Group Note button to initiate the export process.
- Navigate to each patient’s EMR All Notes to view the exported note called IOP Group Note II.
Note: Any data entered after the export action is performed will not carry over to the individual charts. Ensure that all relevant information is entered before exporting to avoid missing data.

Navigating Back to Group Note
![]()
- Go to the Today’s Appointment List.
- Select the group appointment you wish to view.
- Click View Group Note to reopen the note and make any necessary edits.

Signing the Group Note
Signing group notes finalizes the documentation, ensuring accuracy, compliance, and secure record-keeping. This step locks the note, preserving its integrity and allowing further edits only within each patient’s individual chart.
![]()
- Carefully review the Shared Notes, Patient-Specific Notes, Axis & Plan, and Procedures sections to ensure all information is accurate and complete. Ensure all content is correct before signing, as signed notes cannot be modified on the Group Note page.
- Once all sections are finalized, click the Sign Group Note button to sign the entire note.
Important: After signing, the Group Note page will be locked and no longer available for editing. Any further edits or signing of individual notes will need to be completed within each patient’s individual chart.

Note:If you wish to sign the Group Note before exporting it to individual charts, simply click the Sign Group Note button.
Once signed, you can then use the Export Group Note option to distribute the signed note to each patient’s chart. This ensures that the note is finalized before export.

Viewing the Group Note
The following steps outline the process to verify that users can view the content of both unsigned and signed group notes within the EHR system.
Viewing Unsigned Note
![]()
- Go to Today’s Appointment List.
- Access the Group Note . Within the group note interface, click the View Group Note option.
- The Group Notes window should open, displaying all entered information accurately.
- Patients marked as absent will not appear in the patient list within the note header.
- The group note content will be consistently and correctly displayed.

Viewing Signed Note
![]()
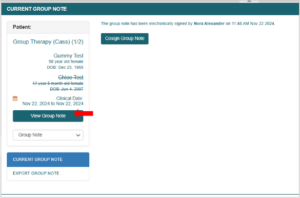
- Go to Today’s Appointment List.
- Access the Group Note. Sign the Group Note using the provided button
- Click the View Group Note option of the signed note.
4. The Group Note window should open, displaying all entered information accurately.
• Patients marked as absent will not appear in the patient list within the note header.
• The group note content will be consistently and correctly displayed.


Visit our FAQ page to find answers to common questions and helpful information.

Still no luck? We can help!
Contact us and we'll get back to you as soon as possible.
Submit a Request