4-STEP EMR WORKFLOW
TODAY’S APPOINTMENT
This allows you to review the patients who are scheduled on a particular date and time. This also helps you to review who among the patients are still waiting to be seen by the provider; who are currently inside the exam room and who are done for the visit.
STEPS
After a patient is scheduled for an appointment, their name will appear under Today’s Appointment List.
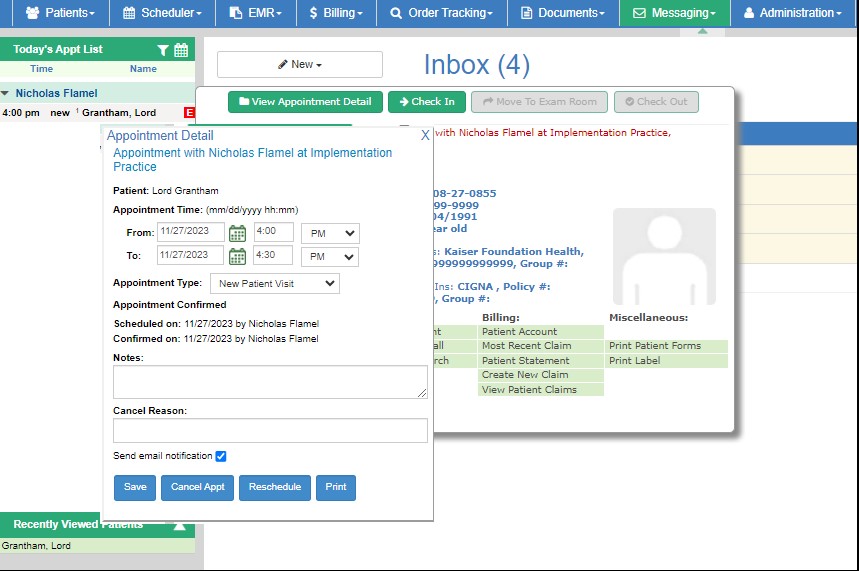
- Appointment Confirmation If the patient calls to confirm the appointment, the front desk can manually confirm by:
- Hover over the patient’s name in the Today’s Appointment List.
- In the hover box, click View Appointment Detail.
From here, you will be able to make modifications on the appointment wherein you can reschedule or cancel the appointment. This will also allow the FD staff to confirm the appointment.
- Click Confirm.
- The patient can also confirm appointments via the patient portal or sms.
In this stage, the Patient’s name turns bold which stands out from the rest so FD staff would know which patients are confirmed to appear for their visit.

- Check-In When the patient arrives at the clinic, the front desk may now proceed with checking in the patient:
- Hover over the patient’s name in the Today’s Appointment List.
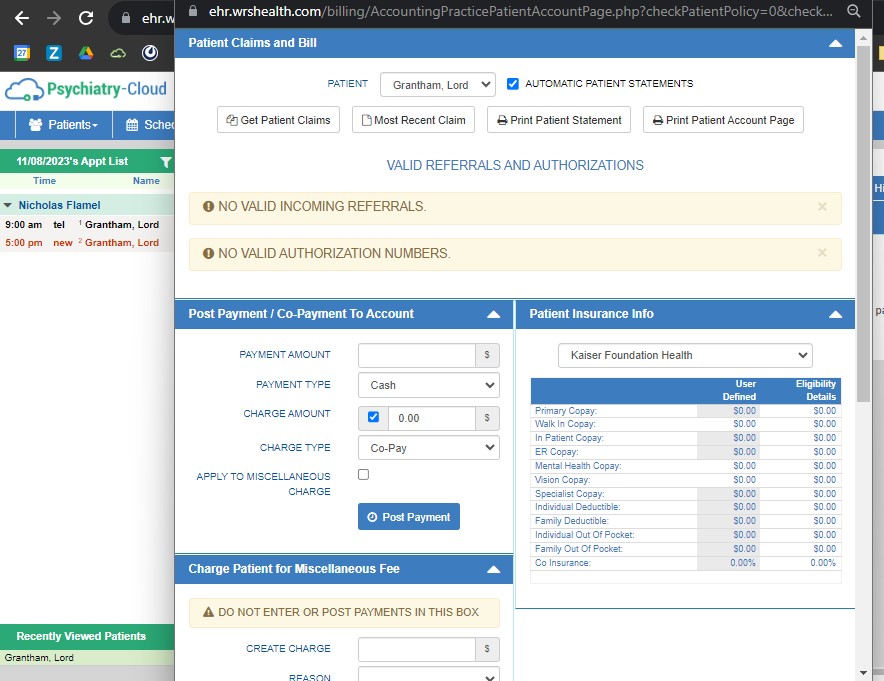
- In the hover box, click Check in. This opens the Patient Account Page in order for FD to collect initial payments, charge copays, edit payments or transfer balances.
- The dollar amount in the charge amount field is automatically filled out based on provider settings (specialty versus primary) and the patient’s insurance details.
In this stage, the Patient’s name turns Red with superscript 2.

NOTES
- If Front Desk is unsure of the payment amount, just keep the Charge-Amount unchecked.
- Move to the Exam Room Once the patient is ready to be seen by the provider, the Front Desk or Medical Assistant may now move the patient to the exam room.
- Hover over the patient’s name in the Today’s Appointment List.
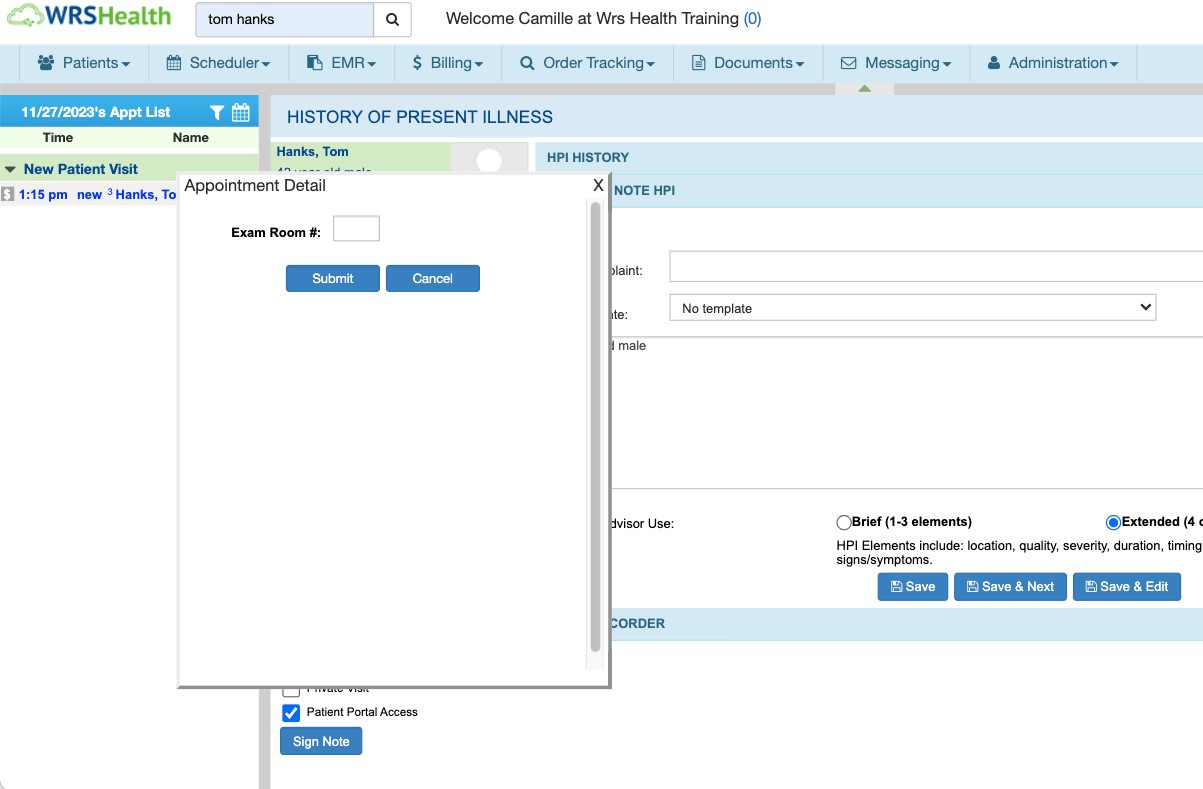
- In the hover box, click Move to Exam Room.
Doing so will trigger three (3) things to happen:
- Assign an Exam Room window pops-open. FD may add numbers or words.
- The patient’s name turns Blue with the assigned room number and superscript 3 signifying the 3rd step of the EMR workflow.
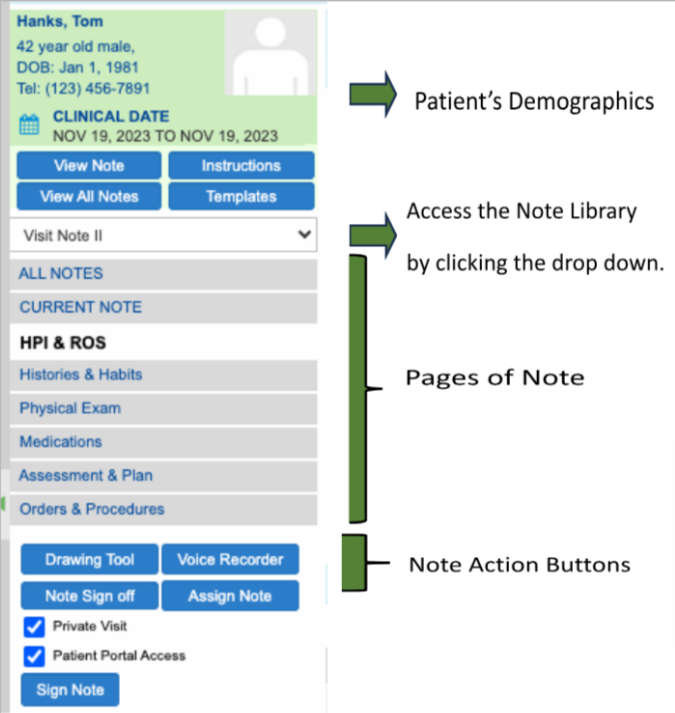
- Creates a new note for that patient with the current date as the date of service.

NOTES
- If the Front Desk is assigning the patient to an exam room, Providers must click on View Most Recent Note upon receiving the patient as clicking on the Move to Exam Room button again will trigger note duplication.
At this point, the provider may now start filling out the patient note.

NOTES
- EMR Notes sections and pages can only be accessed by users with permissions enabled. To enable access for a user, go to Administration → Resource Management → Resource Setup → Select Name of the User → Permission → EMR.
- EMR Note Sharing can be enabled/disabled through Administration → System Setting → Practice Setup. All setting from this page are practice wide, hence, it’s going to affect all users within your practice.
- Check-out Once the patient is done with the appointment, the Front Desk can now proceed to check out the patient.
- Hover over the patient’s name in the Today’s Appointment List.
- In the hover box, click Check Out.
- Doing so opens the Patient account page again.

From here, FD may now be able to finalize payment collection, post payments, and transfer balances. They can also set up Patient appointment recall for follow-up appointments and send Referral Letters if applicable.
In this stage, the Patient’s name turns Green with superscript 4 signifying the final step of the EMR Workflow.

Still no luck? We can help!
Contact us and we'll get back to you as soon as possible.
Submit a Request
