NOTE CREATION
SETUP AND CONFIGURATION
This will allow the practice administrator to review specific clinical permissions and modules and customize them depending on their need or preferences as a practice.
- Go to Preference → EMR Preferences →Note Patient Access Default
(User-Specific Settings)
This is checked by default to allow patients to access their CCDAs in the patient portal.
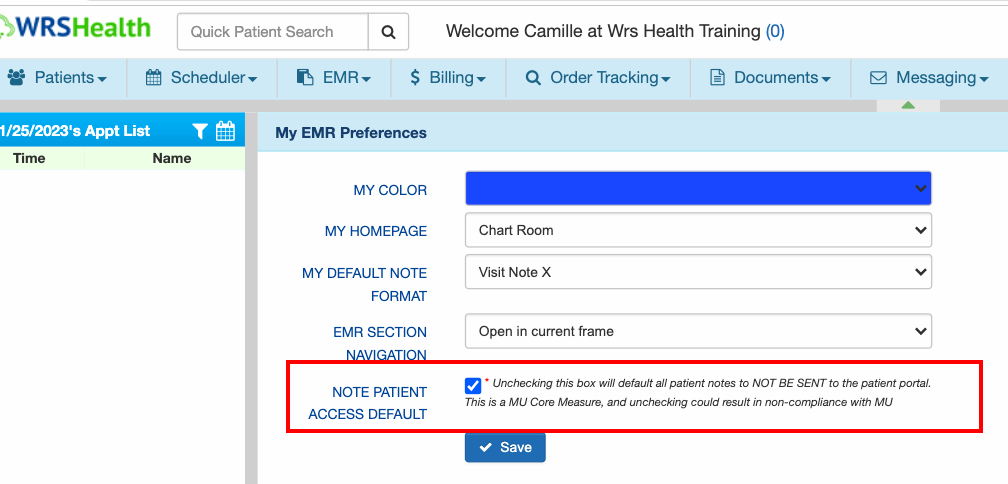
NOTES
Unchecking this box will default all patient notes NOT TO BE SENT to the patient portal. The ONC’s Cures Act Final Rule outlaws any kind of information blocking, including blocking of patient data access. Unchecking this box could result in non-compliance with this rule.
- Go to Administration → Resource Management → Resource Setup
This is where the Practice Administrator makes sure the provider or your staff has enough access to the EMR.
By selecting a user or provider, go to the Permissions tab to enable applicable permission.
- Go to Administration → System Settings → Practice SettingsGo over the different functionalities and determine which ones need to be enabled or disabled according to your practice preference
EMR NOTE
After moving the patient to the Exam Room, this creates the patient note for the encounter which is based on the default note you set in your EMR Preferences.
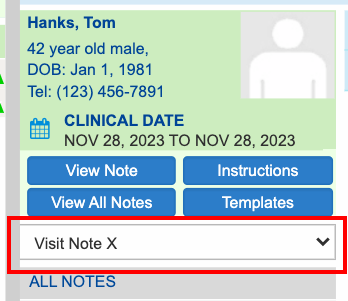
- Patient Demographics display the name, age, date of birth, and phone number
- Clinical Date displays the date of service or visit date
- Note Types: To access the library, click the dropdown and select Customize.
NOTES
WRS has provided a library of specialty-specific note types. The X Note version “New ROS” page where those responses from the check-in module will auto-populate into the ROS page and indicators.
PAGES OF THE NOTE
- HPI – this is where the provider document’s Chief Complaint and the History of the Present Illness.
Providers can add data with the use of HPI Templates, through free text, or the use of any voice recognition apps (Microsoft Surface Pro, Apple, or any devices that offer the same functionality such as Dragon Medical)
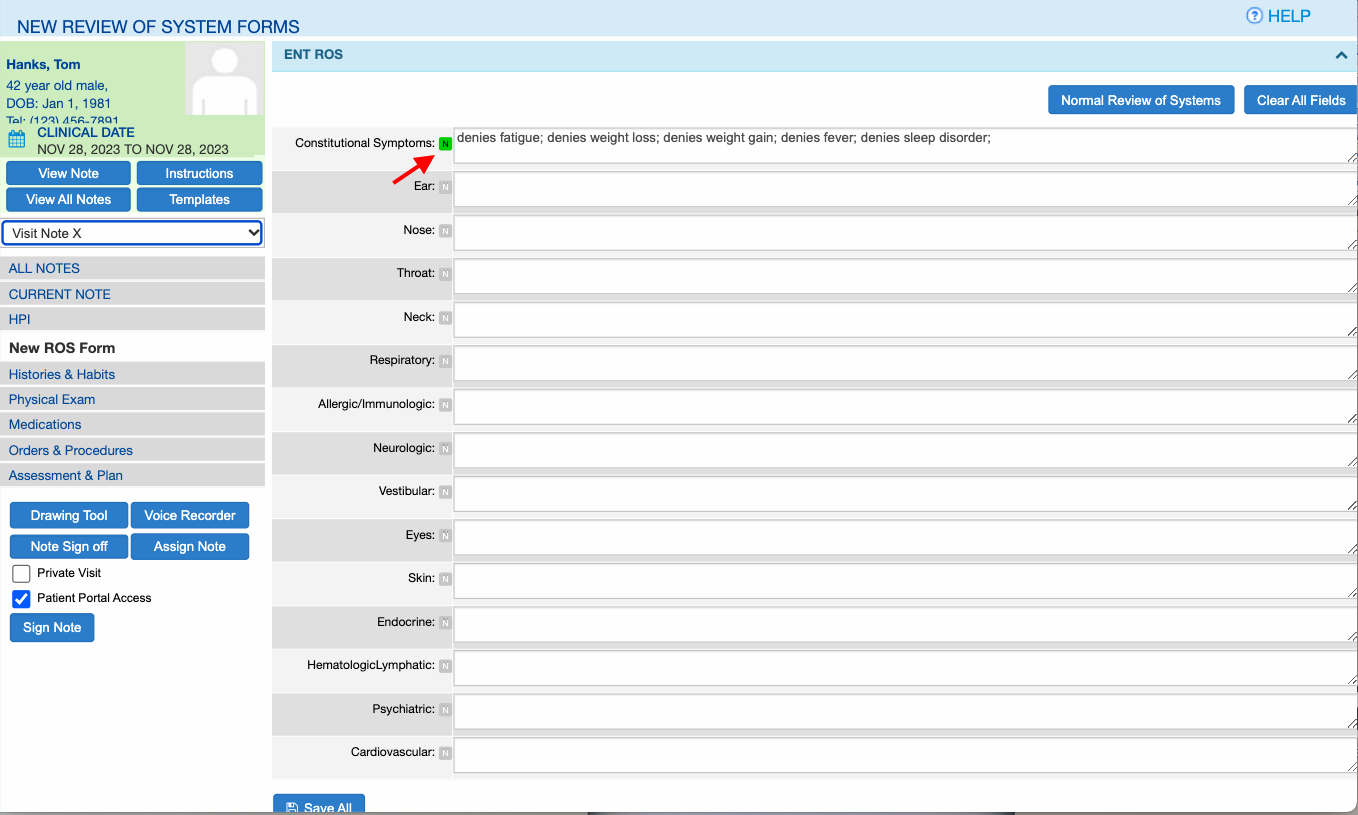
- New ROS Form – this is where subjective findings are documented.
Patient responses via the Check-in Module will populate fields on this page if the feature is enabled.
Providers can enter or modify data on this page through free text, with the use of voice recognition, or by selecting the choice tags by clicking each field.
The ‘N’ icon (Normal Findings) auto- populates normal findings.
Normal Review of Systems auto-populates normal findings across all systems at the same time.
Clear All Fields will delete data in all fields.
- Histories and Habits – houses the patient’s medical history. Information can be obtained from the patient portal, or, during the patient visit.
Click ‘Add New’ and mark off any applicable conditions from the list. Or you can add free text at the bottom.
Click Submit to save the data.
- Physical Exam – this is where providers will document the objective findings of the patient.
Providers can enter free text data, use voice recognition, or use customizable choice tags.
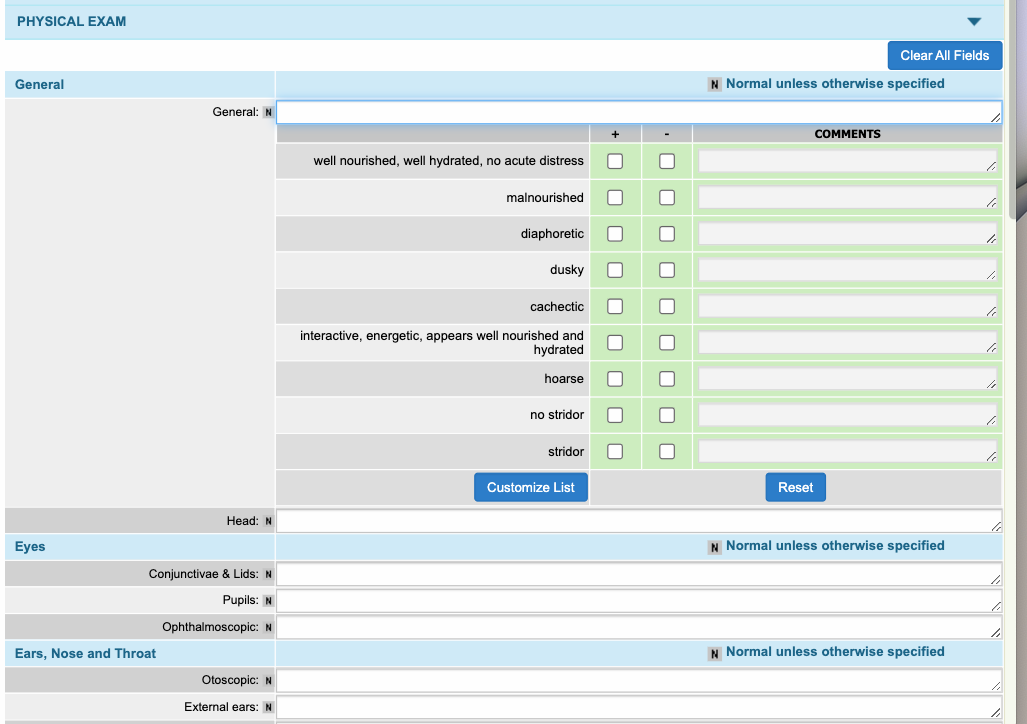
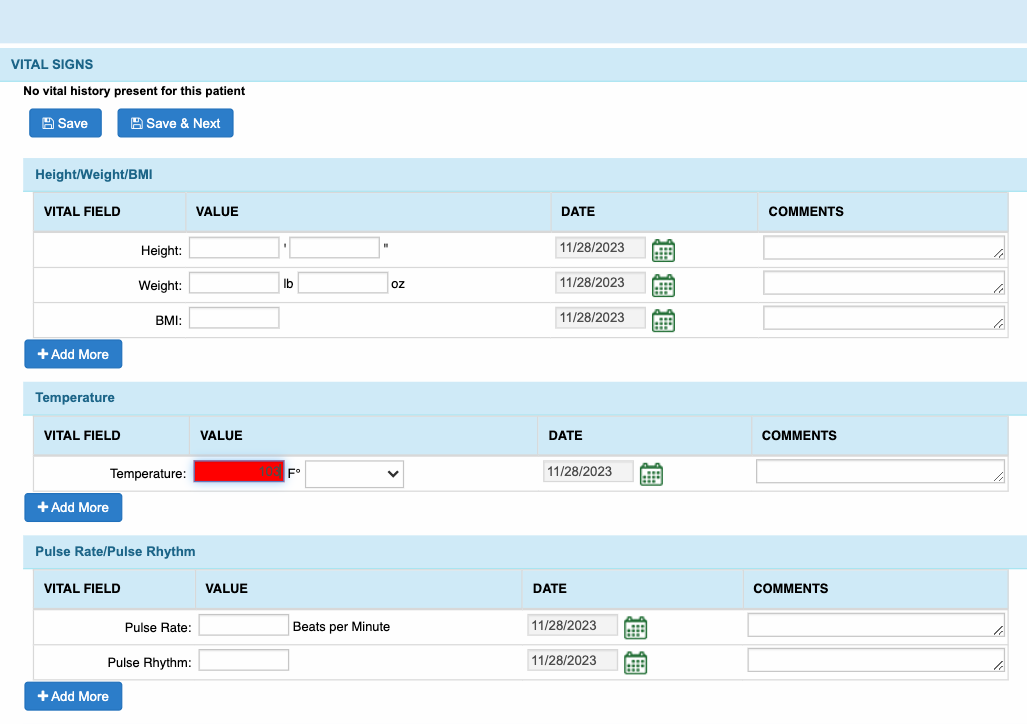
- Vital Signs – located on top and collapsed.
The main feature of this section is that any value entered above or below the normal range, field will be highlighted in red.
Provider may add more fields of each section by clicking on the Add More button if applicable.
Then, click Save once done.
- Medications – houses the patient’s current medications and allergies, and also e-prescriptions.
There are three (3) ways to Add a Prescription:
- Search and select from the FirstDatabank (FDB) databaseThis will allow providers to quickly search medications that are currently active and listed in the FirstDataBank (FDB).
Select the medication from the dropdown of suggested medications with its form.
Fill out the sig pad according to its Dosage, Route, Frequency, Quantity, Unit of Measurement, and Duration. Otherwise, medications may error out when sent electronically to the pharmacy.
Click Add and it will be added to the Current Note Prescription section.
NOTES
Users are advised to select a medication from the dropdown, for the drug to have an associated RXnorm code and NDC code. Medications with unknown dosages are not associated with the NDC codes. This ensures that the medications selected are up-to-date and consistent with the latest available pharmaceutical information.
-
Represcription
This allows providers to repeat previously prescribed medication.
Hover over the medication name and do the right click.
Select Represcribe/ New Script and it pops open the Represcribe window.
Complete the sig pad.
Then click the Represcribe button to add to the Current Note Prescription.

-
Select from Frequently Prescribed Medications
Click the ‘+’ icon then click the dosage to load the sig pad.
When done, click Add Prescription.


- Orders and Procedures – this is where orders and procedures are documented.
- You can use the search bar to look up active CPT (Current Procedural Terminology) codes. These are updated following the current year’s CPT coding updates for documentation and billing needs.
- Search the CPT code
- Toggle Procedure to document the services you rendered.
- Toggle to Order to document the lab codes you would like to order for the lab facility.
- Then CPT codes will be added under the Current Procedure or Current Order list below.
-
You can also select directly from the superbills (blue tabs) below.
Select an order or procedure from the superbills then it will be added immediately to the Current Procedure or Current Order list below.
Service Coding enables you to determine the suggested CPT code for services you rendered, based on the amount of time spent, and/or risk of complication selected.
- Select Type of visit
- Select the Total time
When done, click Save.

- Make sure to toggle the switch either to Order or Procedure before searching for a codr.
- Code under Procedure are meant to be billed to the patient or their insurances, while, codes under Orders are meant to NOT meant to be billed to the patient nor their insurance.

NOTES
- Assessment and Plan
This is where Diagnosis codes and action plans are documented.
- Providers can search for the diagnosis codes under the Add Problem section.
- They can also select the diagnoses found in User Most Frequent Diagnoses, which tracks the provider’s most commonly used codes. Or, in Practice Most Frequent Diagnoses, which tracks the most commonly used codes of the entire practice.
Then Click Add to Current Note Assessment.

- They can utilize the Superbill below. Simply tick the checkbox next to any code you want to use
- Then select on Add to Current Note Assessments.
They can add plans and instructions that are not directly associated with a diagnosis in the Disposition field.
To customize the list, click Customize List then enter the description. Afterwhich, click Add Entry to add the item in the list.
Providers may document when the patient should go back to the clinic for a follow-up visit, by ticking the checkbox to can indicate the number of days, weeks, months, or years for the next follow-up.
Once done, click Save.
NOTES
- The Plan text box and Disposition text box in the Assessment & Plan page will now automatically save the progress every 10 seconds, ensuring that information is regularly saved to eliminate the possibility of losing any unsaved work.

Still no luck? We can help!
Contact us and we'll get back to you as soon as possible.
Submit a Request